What Is AVAX? How to Transfer AVAX Between C-Chain, X-Chain, and P-Chain?
What Is AVAX?
Avalanche is an open-source platform for launching decentralized applications and enterprise blockchain deployments in one interoperable, highly scalable ecosystem. Avalanche is the first decentralized smart contracts platform built for the scale of global finance, with near-instant transaction finality. Ethereum developers can quickly build on Avalanche as Solidity works out-of-the-box.
A key difference between Avalanche and other decentralized networks is the consensus protocol. Over time, people have come to a false understanding that blockchains have to be slow and not scalable. The Avalanche protocol employs a novel approach to consensus to achieve its strong safety guarantees, quick finality and high-throughput without compromising decentralization.
What Is AVAX Token?
AVAX is the native token of Avalanche. It's a hard-capped, scarce asset that is used to pay for fees, secure the platform through staking, and provide a basic unit of account between the multiple subnets created on Avalanche. 1 nAVAX is equal to 0.000000001 AVAX.
How Does Avalanche Consensus Work?
Protocols in the Avalanche family operate through repeated sub-sampled voting. When a validator is determining whether a transaction should be accepted or rejected, it asks a small, random subset of validators whether they think the transaction should be accepted or rejected. If the queried validator thinks the transaction is invalid, has already rejected the transaction, or prefers a conflicting transaction, it replies that it thinks the transaction should be rejected. Otherwise, it replies that it thinks the transaction should be accepted.
If a sufficiently large portion (alpha α) of the validators sampled reply that they think the transaction should be accepted, the validator prefers to accept the transaction. That is, when it is queried about the transaction in the future, it will reply that it thinks the transaction should be accepted. Similarly, the validator will prefer to reject the transaction if a sufficiently large portion of the validators replies that they think the transaction should be rejected.
The validator repeats this sampling process until the alpha of the validators queried reply the same way (accept or reject) for beta β consecutive rounds.
In the common case when a transaction has no conflicts, finalization happens very quickly. When conflicts exist, honest validators quickly cluster around conflicting transactions, entering a positive feedback loop until all correct validators prefer that transaction. This leads to the acceptance of non-conflicting transactions and the rejection of conflicting transactions.
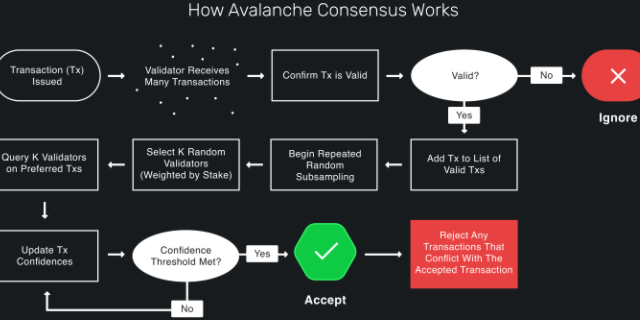
It is guaranteed (with high probability based on system parameters) that if any honest validator accepts or rejects a transaction, all honest validators will accept or reject that transaction.
What Are the Key Features of Avalanche?
- Speed
Uses a novel consensus protocol, developed by a team of Cornell computer scientists, and is able to permanently confirm transactions in under 1 second.
- Scalability
Capable of 4,500 transactions per second–an order of magnitude greater than existing blockchains.
- Security
Ensures stronger security guarantees well-above the 51% standard of other networks.
- Flexibility
Easily create custom blockchains and decentralized apps that contain almost any arbitrary logic.
- Sustainability
Uses energy-efficient proof-of-stake consensus algorithm rather than proof-of-work.
- Smart Contract Support
Supports the creation of Solidity smart contracts and your favorite Ethereum tools like Remix, Metamask, Truffle, and more.
- Private and Public Blockchains
Create your own public or private blockchains.
- Designed for Finance
Native support for easily creating and trading digital smart assets with complex, custom rulesets.
What Are the Avalanche 3 Built-in Blockchains?
Avalanche features 3 built-in blockchains: Exchange Chain (X-Chain), Platform Chain (P-Chain), and Contract Chain (C-Chain). All 3 blockchains are validated and secured by the Primary Network. The Primary Network is a special subnet, and all members of all custom subnets must also be a member of the Primary Network by staking at least 2,000 AVAX.
- Exchange Chain (X-Chain)
The X-Chain acts as a decentralized platform for creating and trading digital smart assets, a representation of a real-world resource (e.g., equity, bonds) with a set of rules that govern its behavior, like "can't be traded until tomorrow" or "can only be sent to US citizens."
One asset traded on the X-Chain is AVAX. When you issue a transaction to a blockchain on Avalanche, you pay a fee denominated in AVAX.
The X-Chain is an instance of the Avalanche Virtual Machine (AVM). The X-Chain API allows clients to create and trade assets on the X-Chain and other instances of the AVM.
- Platform Chain (P-Chain)
The P-Chain is the metadata blockchain on Avalanche and coordinates validators, keeps track of active subnets, and enables the creation of new subnets. The P-Chain implements the Snowman consensus protocol.
The P-Chain API allows clients to create subnets, add validators to subnets, and create blockchains.
- Contract Chain (C-Chain)
The C-Chain allows for the creation of smart contracts using the C-Chain's API.
The C-Chain is an instance of the Ethereum Virtual Machine powered by Avalanche.
What's the Difference Between the Avalanche C-Chain, X-Chain, and P-Chain?
If you withdraw AVAX from exchanges to the Avalanche network, you face one problem, there are three different chains, which one should be selected? So it is important to identify the 3 chains and know the differences.
- Contract Chain (C-Chain)
C-Chain is the chain for smart contracts, one of the most widely use cases of C-Chain is DeFi. So if you went to join in the DeFi related projects, you should use the C-Chain. C-Chain uses an Ethereum-style address with 0x at the beginning, differing from X-Chain, and P-Chain. It also supports the MetaMask wallet, so you can add the Avalanche C-Chain network to the MetaMask wallet.
- X-Chain (Exchange Chain)
Differ from the C-Chain, X-Chain is not supported by the third-party wallet, the address can only be accessed from the Avalance wallet. The X-Chain is simply for sending and receiving funds, not for Defi or any other purposes. Another feature different from C-Chain is that the transfer fee of X-Chain is fixed 0.001 AVAX, while C-Chain is changeable. The transfer speed is also faster than C-Chain.
- P-Chain (Platform Chain)
The main purpose of P-Chain is staking AVAX and serving as a validator. The reward for the validator can be received in this chain.
How to Transfer AVAX Between the X-Chain and C-Chain?
The easiest way to transfer AVAX between chains is to use the Avalanche Wallet which is a non-custodial and secure way to access and move AVAX.
- Step 1 - Open the Avalanche Wallet
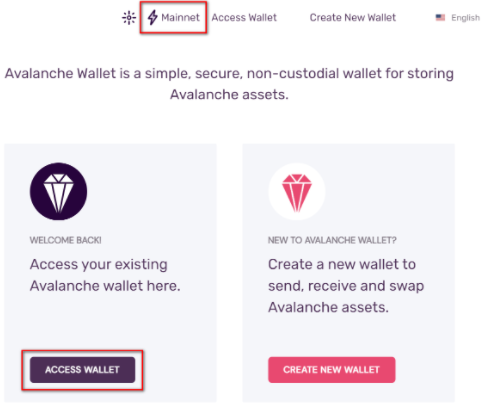
Select Access Wallet to enter your wallet. To connect the wallet to a network other than the main Avalanche network, select Mainnet and choose the network to connect to.
- Step 2 - Log In to Your Wallet
You can access your wallet using the private key, mnemonic key phrase, keystore file or Ledger Nano S. C-Chain transfers via Ledger are not supported yet.
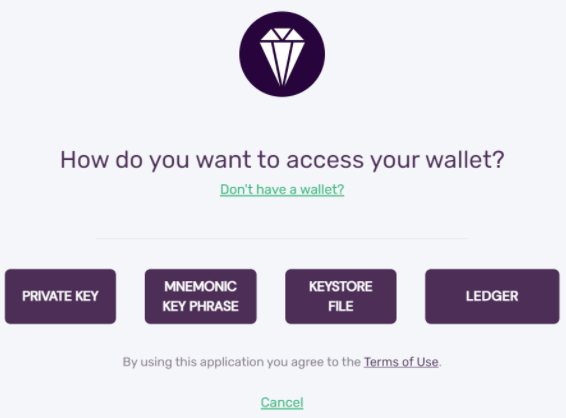
After a successful login you will see your balance, assets portfolio and various other information.
- Step 3 - Go to the Cross Chain Tab
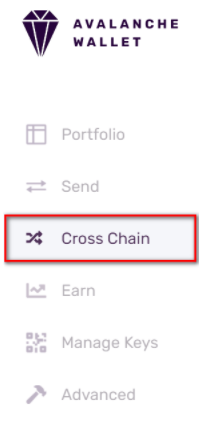
Functionality for transferring tokens between chains is on the Cross Chain tab.
- Step 4 - Enter Amount to Transfer
You will be presented with a choice for Source Chain and Destination Chain. Select X-Chain and C-Chain, respectively. You will see your X and C balances, and an input field for entering the amount to transfer from source to destination chain.
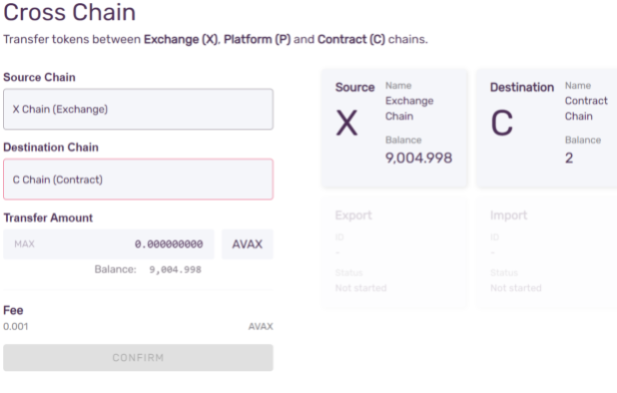
Enter the amount you wish to transfer from the X-Chain to the C-Chain.
- Step 5 - Confirm the Transaction
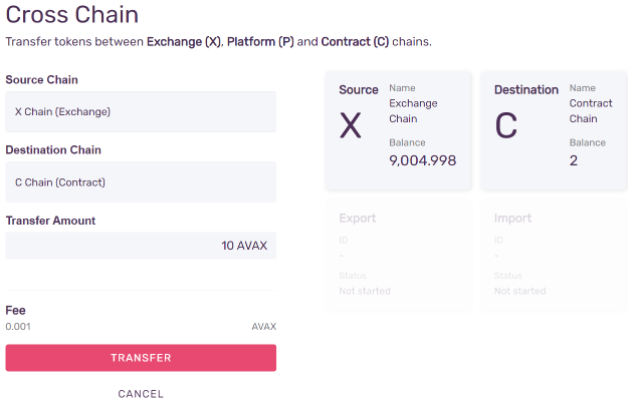
Press Confirm, and then Transfer to initiate the transfer.
- Step 6 - Done!
A cross-chain transfer is a two-step process: first a transaction to export the funds from the X-Chain, and another to import them to the C-Chain. The wallet will do both and show the progress while doing so.
That's it! You've transferred AVAX from the X-Chain to C-Chain!
Transfer from the C-Chain to X-chain:
To return the AVAX back to the X-Chain, you need to do the transfer in the opposite direction.
Swap source and destination chain, by selecting them from the Source and Destination dropdown menu. The rest of the process is the same: enter the amount, confirm and transfer.
How to Transfer AVAX Between the X-Chain and P-Chain?
The easiest way to transfer AVAX between chains is to use the Avalanche Wallet, which is a non-custodial and secure way to access and move AVAX.
- Step 1 - Open the Avalanche Wall
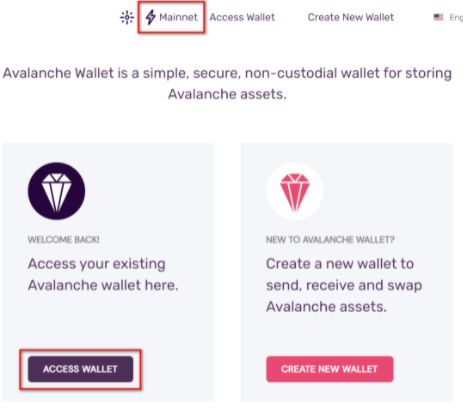
Select Access Wallet to enter your wallet. To connect the wallet to a network other than the main Avalanche network, select Mainnet and choose the network to connect to.
- Step 2 - Log In to Your Wallet
You can access your wallet using the private key, mnemonic key phrase, keystore file or Ledger Nano S.
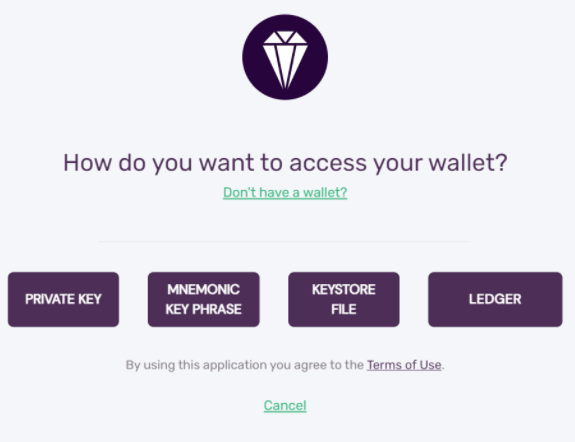
After a successful login you will see your balance, assets portfolio and various other information.
- Step 3 - Go to the Cross Chain Tab
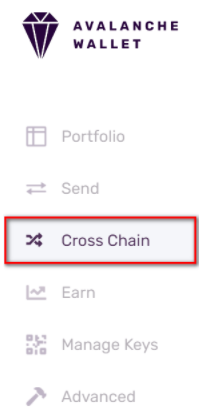
Functionality for transferring tokens between chains is on the Cross Chain tab.
- Step 4 - Enter Amount to Transfer
You will be presented with a choice for Source Chain and Destination Chain. Select X-Chain and P-Chain, respectively. You will see your X and P balances, and an input field for entering the amount to transfer from source to destination chain.
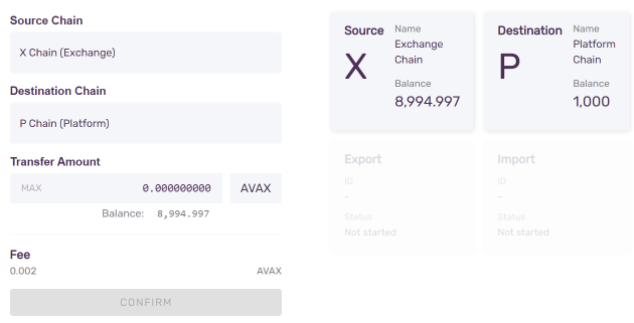
Enter the amount you wish to transfer from the X-Chain to the P-Chain.
- Step 5 - Confirm the Transaction
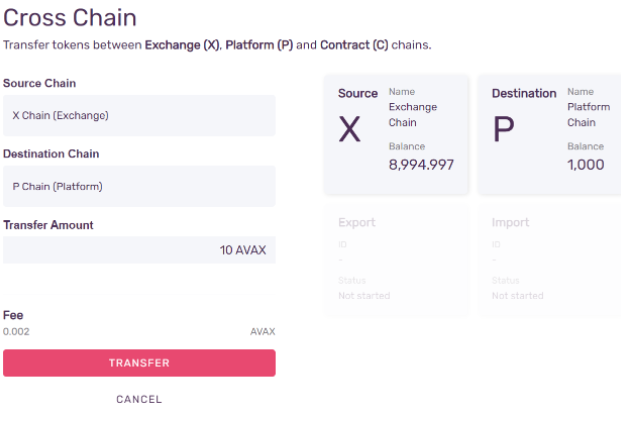
Press Confirm, and then Transfer to initiate the transfer.
- Step 6 - Done!
A cross-chain transfer is a two-step process: first a transaction to export the funds from the X-Chain, and another to import it to the P-Chain. The wallet will do both and show its progress while doing so.
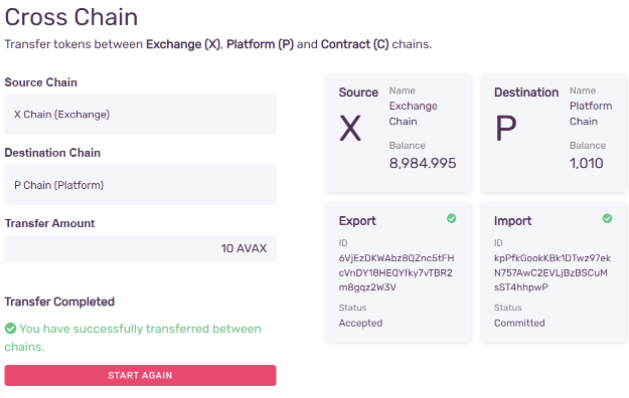
That's it! You've transferred AVAX from the X-Chain to P-Chain! Now you can use them to validate or delegate on the Avalanche network.
Transfer from P-Chain to X-Chain
To return the AVAX back to the X-Chain, you need to do the transfer in the opposite direction.
Swap the source and destination chains by selecting them from the Source and Destination drop-down menu. The rest of the process is the same: enter the amount, confirm and transfer.
Follow us at: https://www.coincarp.com/learns/
Comments
Post a Comment